These projects run from a single evening of card assembly to a macrame backdrop that takes real patience, and the right match depends on whether you need something guests handle up close or something that fills a photo from across the room.
A boutonniere wired with floral tape and narrow ribbon sits at the lapel in every formal portrait; a photo booth wall built from thrifted frames or garland and fairy lights becomes the place where guests linger longest.
Start with what the camera will actually see.
1. Photo Booth Backdrop
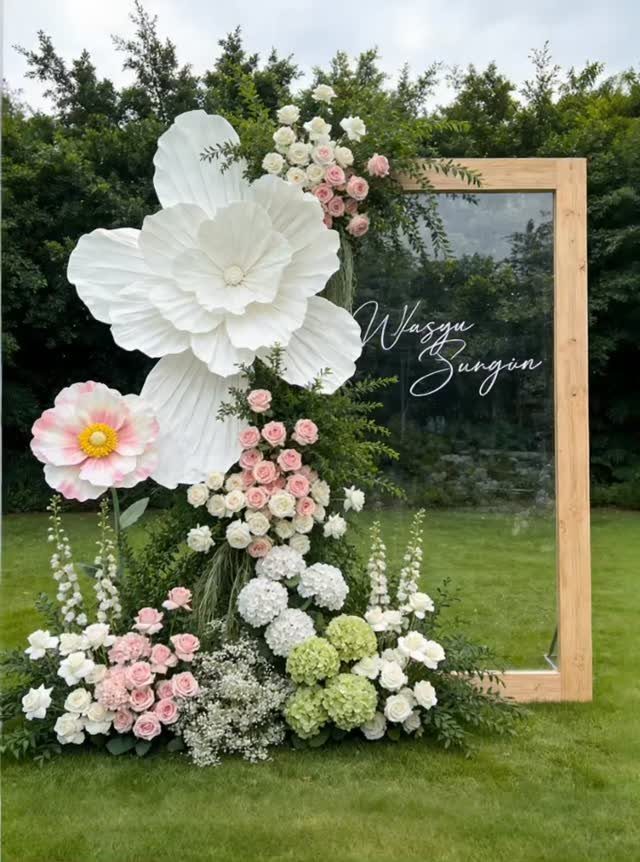
A photo booth backdrop turns an empty wall or lawn corner into the place where guests linger longest. Build a simple wooden frame and drape it with garlands, fairy lights, or clipped Polaroids from your relationship.
Thrifted vintage frames hung in clusters give the same eclectic look without any construction. Paper flowers and fresh roses work against clear acrylic if you want something that reads modern rather than rustic.
The version you build can double as an escort card display earlier in the day, then move to photo duty after dinner.
2. DIY Flower Arrangements
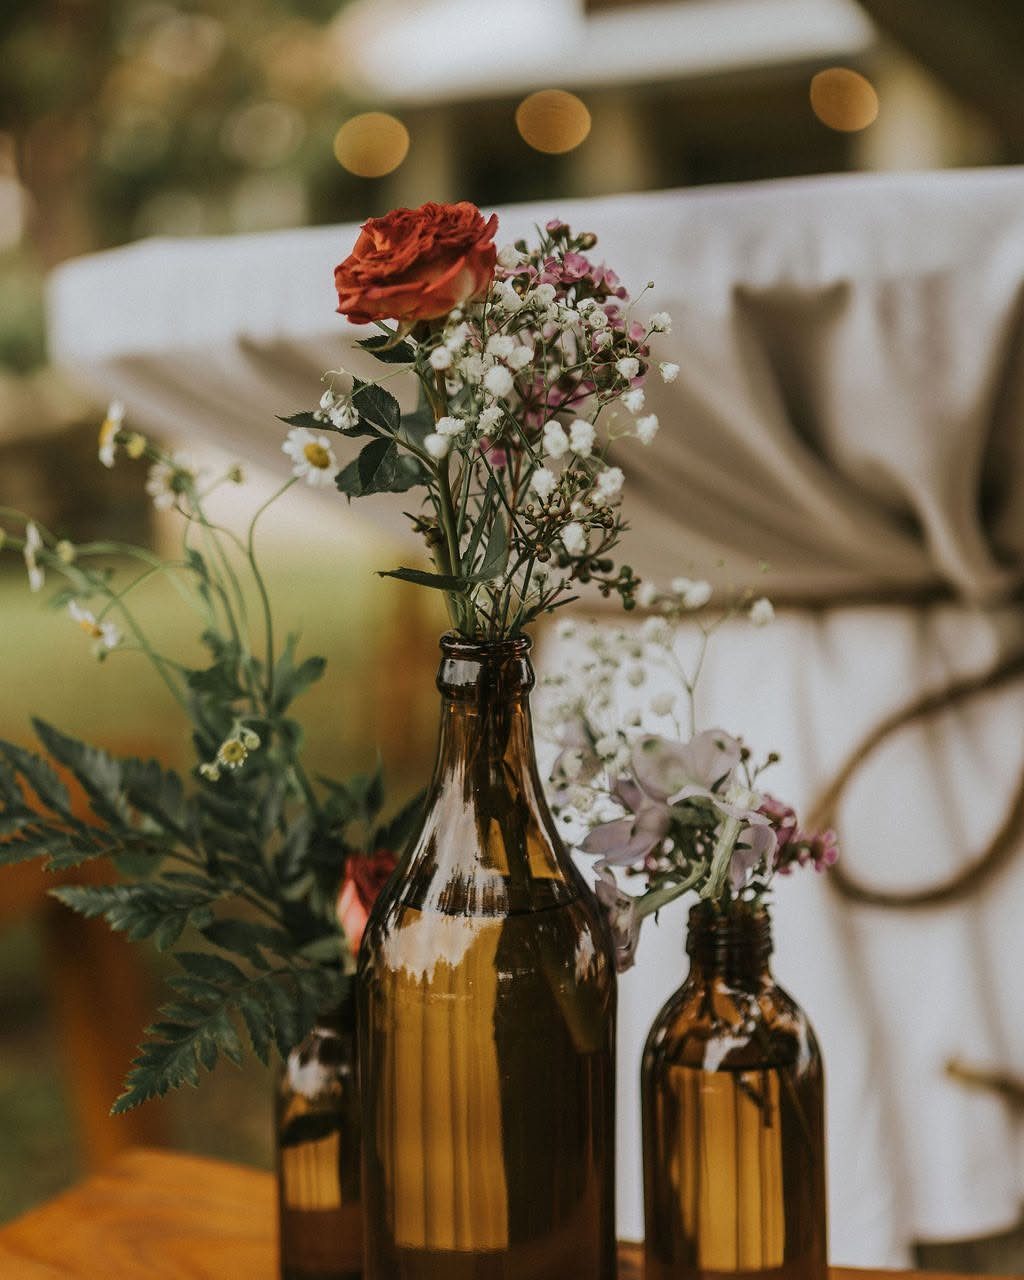
Filling amber bottles with seasonal stems from a farmers market or your own yard costs a fraction of florist pricing and looks more relaxed than formal arrangements.
The simplest version uses no foam and no tape, just stems cut to fit and water changed the morning of.
If your garden isn’t producing, a nearby florist’s loose stems fill gaps. Wrap bases in ribbon or add trailing fabric for the final piece.
3. Wooden Boards Signage
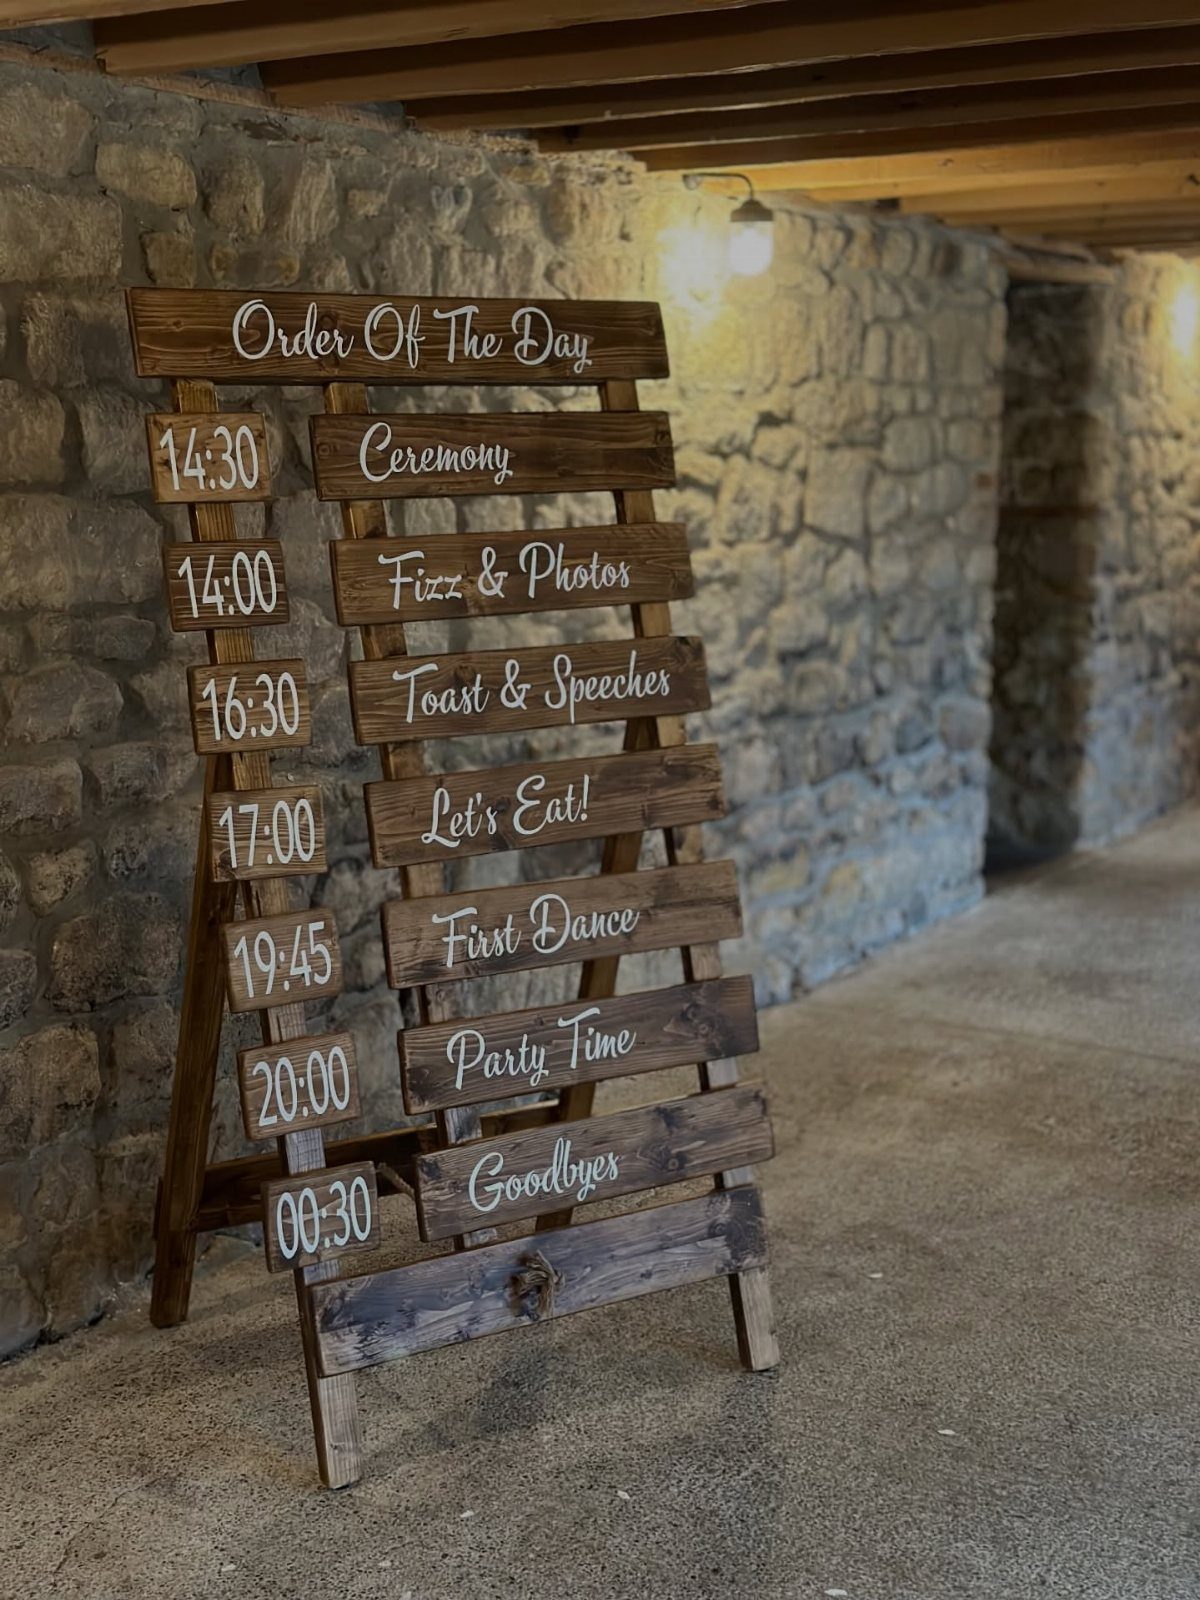
Wooden boards painted with calligraphy carry weight that printed signs cannot, and they survive the wedding to hang in your home later.
A standing plank works for schedules, quotes, or directional arrows guests actually notice. Chalkboard paint lets you rewrite for a welcome dinner or brunch, though a permanent painted version reads cleaner in photos and needs no last-minute nerves about smudging.
Match the stain or paint to your venue’s existing wood tones, or deliberately contrast if your palette runs lighter.
4. Cardstock Wedding Invitations
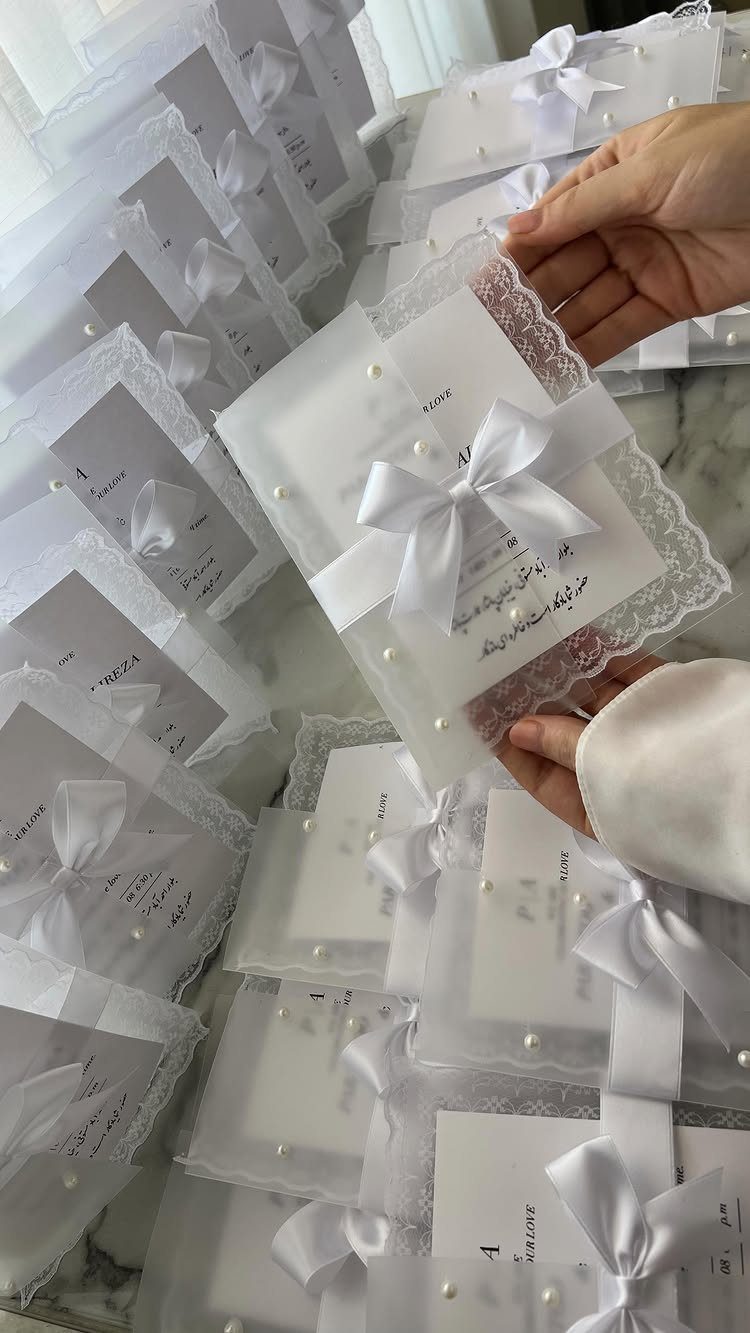
Heavy cardstock holds up through mailing season and gives guests something to keep on a refrigerator, which digital invites rarely manage.
Start with a paper-cutting machine if you have access; the Cricut handles lace patterns and layered edges that look professional without the printing-house minimums.
Glue the bow and trim instead of sewing, which saves hours if you are making fifty. Assemble a prototype first to time yourself; embellishments multiply fast.
5. Macrame Backdrop
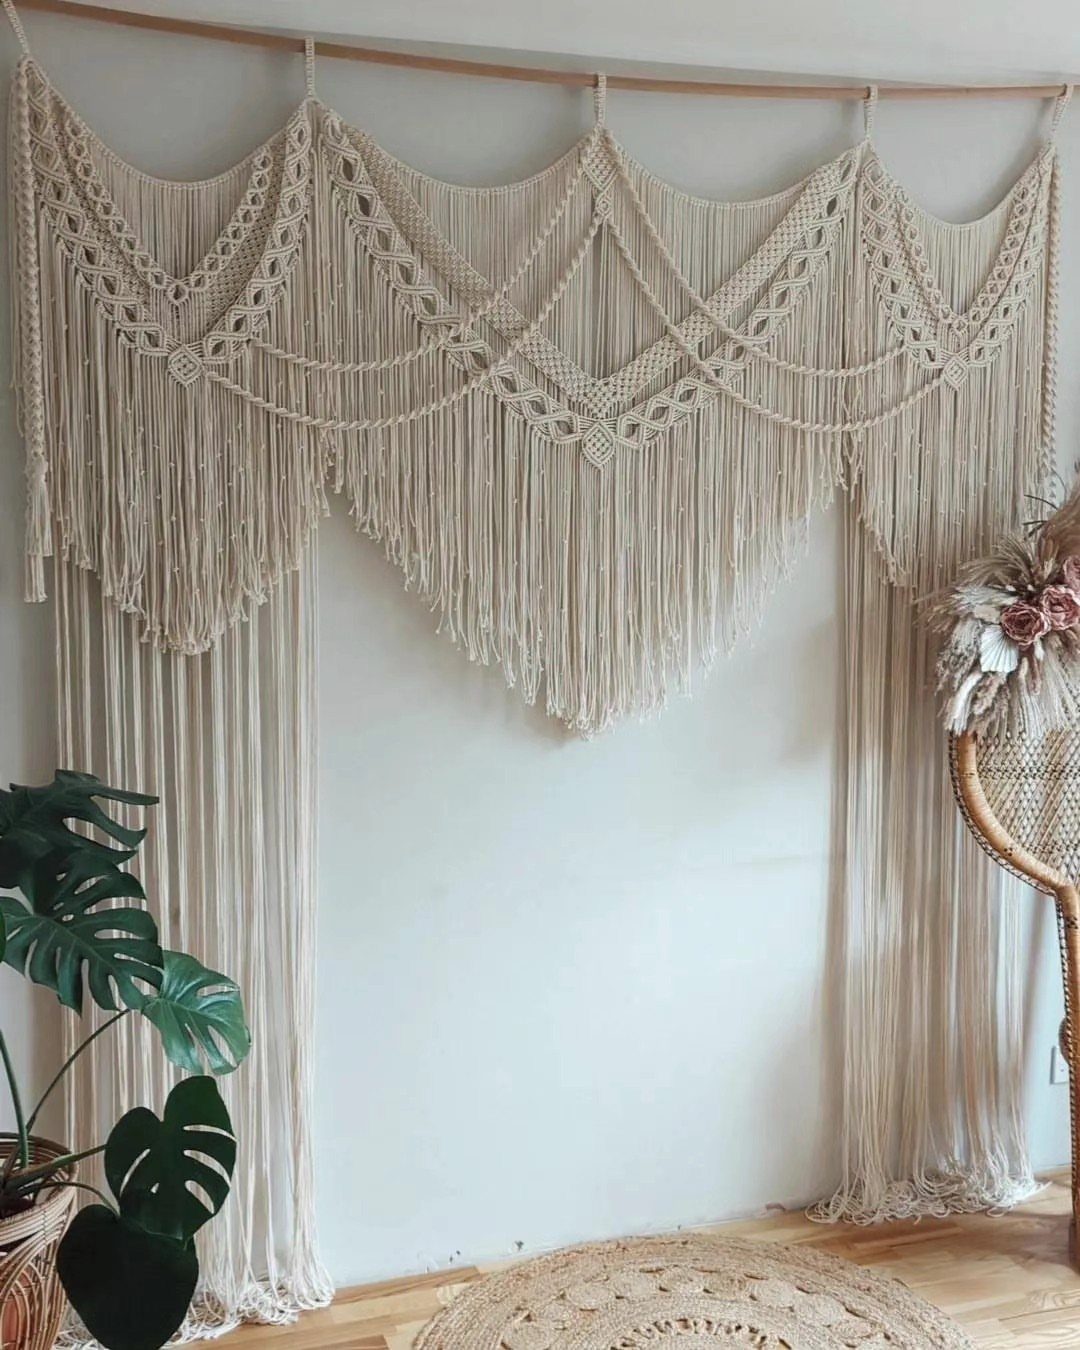
Macrame reads current without demanding color decisions, since natural cord fits nearly any palette you have already chosen.
A few basic knots repeated at scale build into a textured curtain hung from a simple wooden rod. The fringe catches light during ceremony photos and moves slightly if there is any breeze outdoors.
Potted greenery nearby extends the backdrop without more knotting. This suits couples who want one large handmade piece rather than scattered small crafts; the time goes in up front, then setup is just two hooks.
6. Stylish Table Numbers
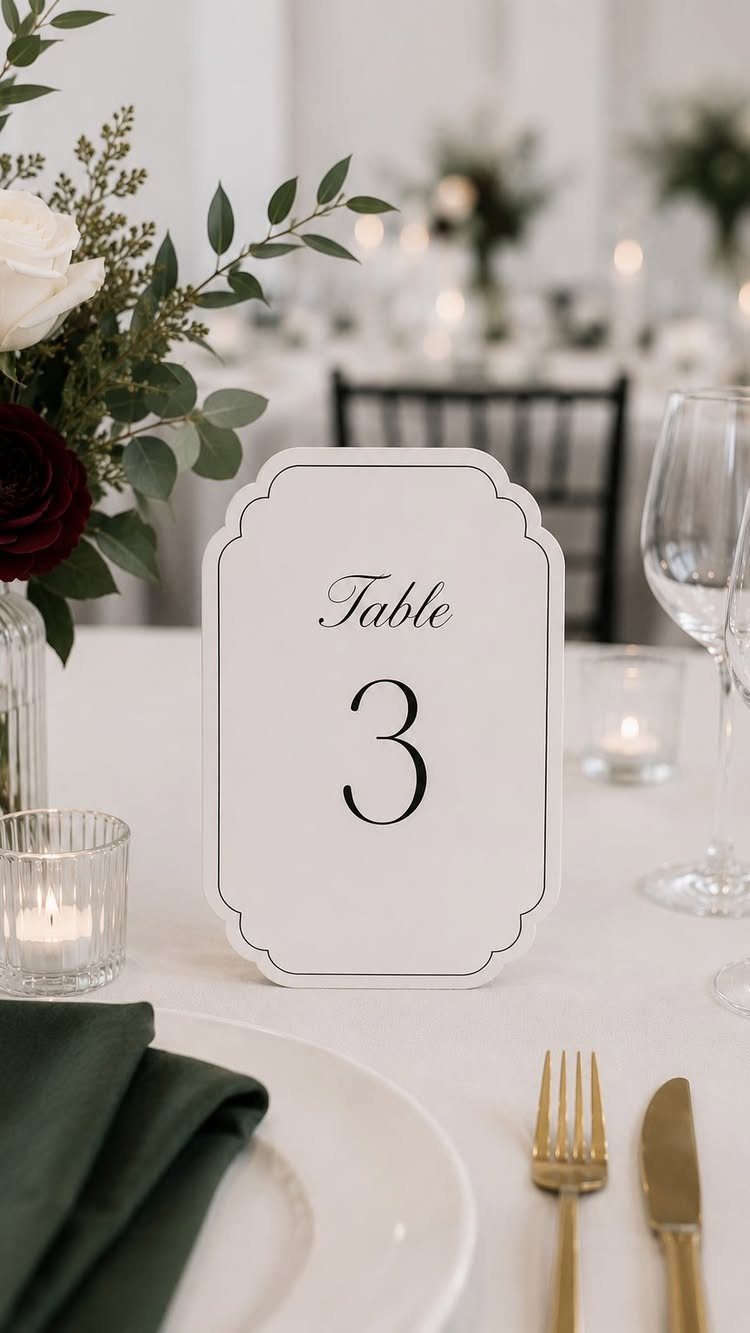
Scalloped card stock printed with a clean number handles table identification without competing with florals or candles you have already planned. A flat version that sits beside glassware means no stand to source or weight to balance.
If your tables run long rather than round, consider whether guests approach from one side or both; a single face works for the former, double-sided for the latter.
Paint, clay, or framed couple photos at matching ages are alternate routes if you want more crafting time, though each adds steps this simple card avoids.
7. DIY Wedding Boutonnieres
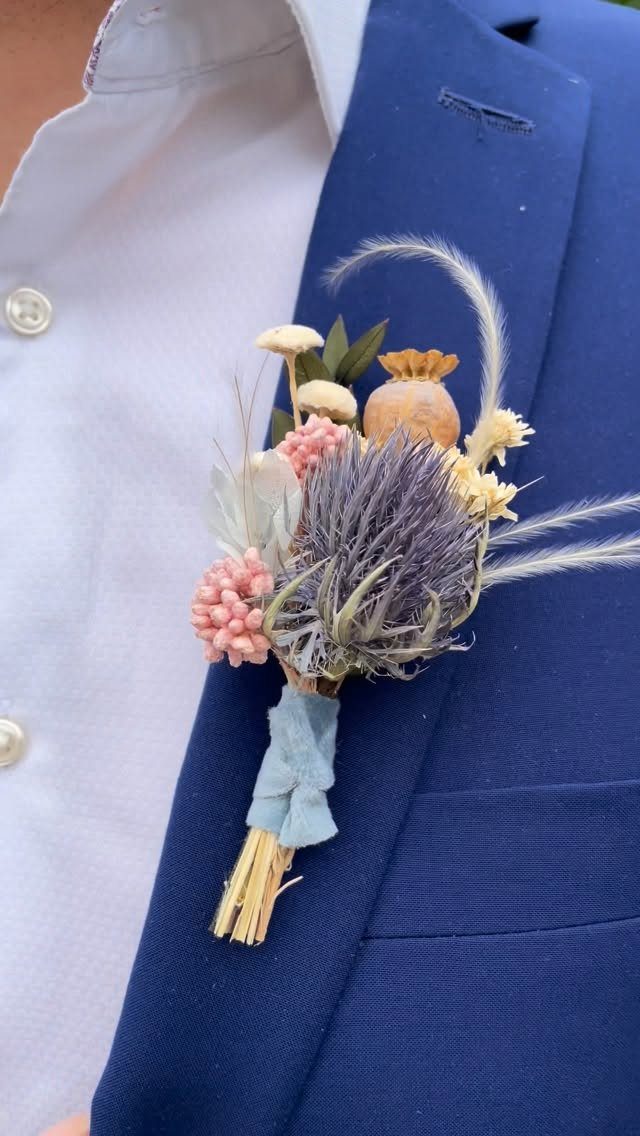
Fresh boutonnieres wilt by cocktail hour, but dried thistle and poppy pods hold their shape through the last dance and beyond.
Wire small stems together with floral tape, then cover the bind with narrow ribbon or twine in a color that reads against your suit fabric. Blue reads reliably against navy or charcoal; cream or sage suit lighter palettes.
These need no water and no cooler, which matters when groomsmen scatter between photos and the ceremony.
Make one prototype to test the pin angle; too vertical and it catches a lapel edge, too flat and it droops. Ribbon tails should end above the pocket line, not compete with it.
8. Candle Making
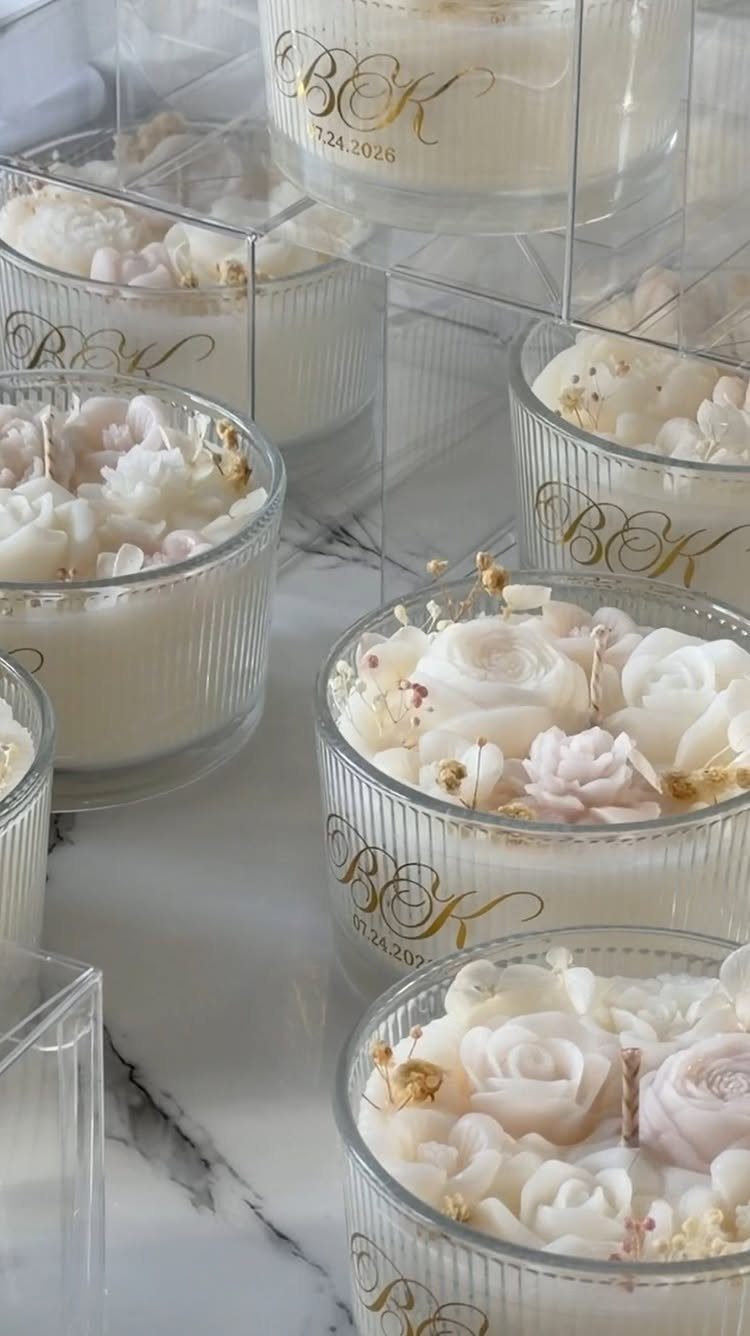
Paraffin or soy wax takes scent and dye evenly, and fluted glass holders push the result past craft-fair quality into something ceremony-ready.
Pour in layers if you want 2 tones, or suspend a molded wax flower on the surface once the first pour sets. Monogram decals in gold foil handle the personalization without carving skill.
The batch size depends on your table count; favors run smaller, centerpieces taller.
Test burn one to check the wick length and throw before you commit to twenty. Scent lingers in wax for months if stored cool, so this is a project you can finish early rather than the week before.
9. Beverage Station
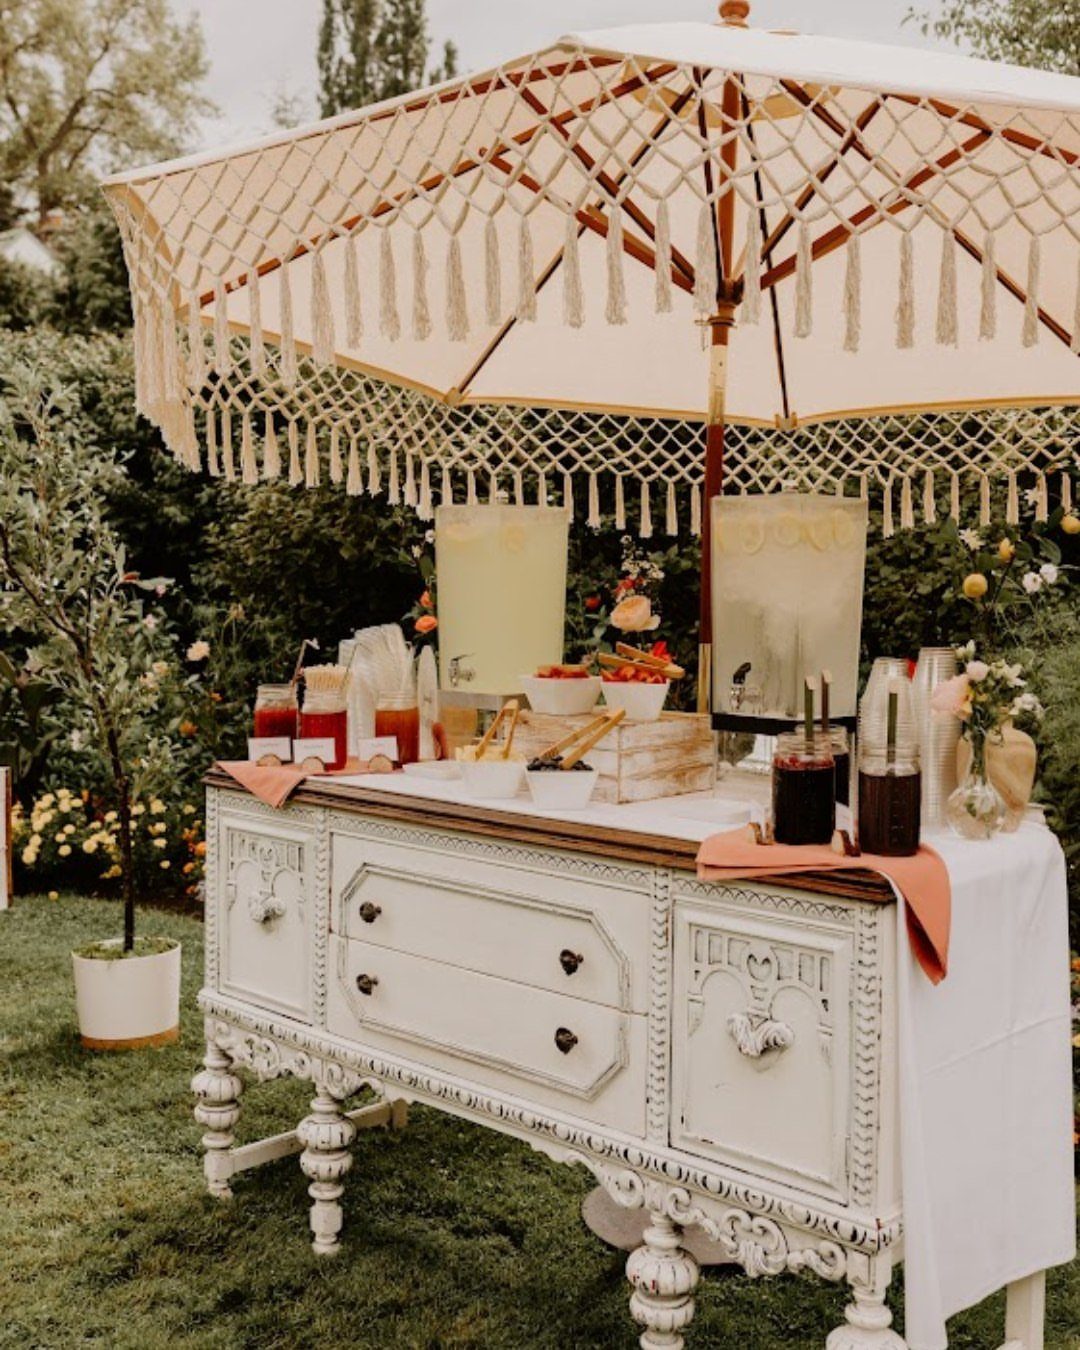
A self-serve station moves traffic away from the bar during the cocktail gap and gives guests something to do with their hands.
Large glass dispensers with lever spigots let people mix their own strength; set out a clear and a dark option, plus sliced citrus and herb sprigs in separate bowls.
The furniture matters as much as the drinks. A painted sideboard at standard counter height means no bending, and a fringed umbrella overhead turns afternoon sun from problem to atmosphere.
Position it where a line forms without blocking doorways or photo sightlines. Ice runs down faster than you expect; assign someone a refill check every half hour.
Benefits of DIY Weddings
DIY work trades money for time, and the exchange only makes sense if you actually keep the savings.
A paper-cutting machine borrowed from a friend turns invitation assembly from a week into an evening; buying one for a single wedding does not.
The same math applies to macrame cord, wax by the pound, and lumber for backdrops. Rent or borrow before you purchase.
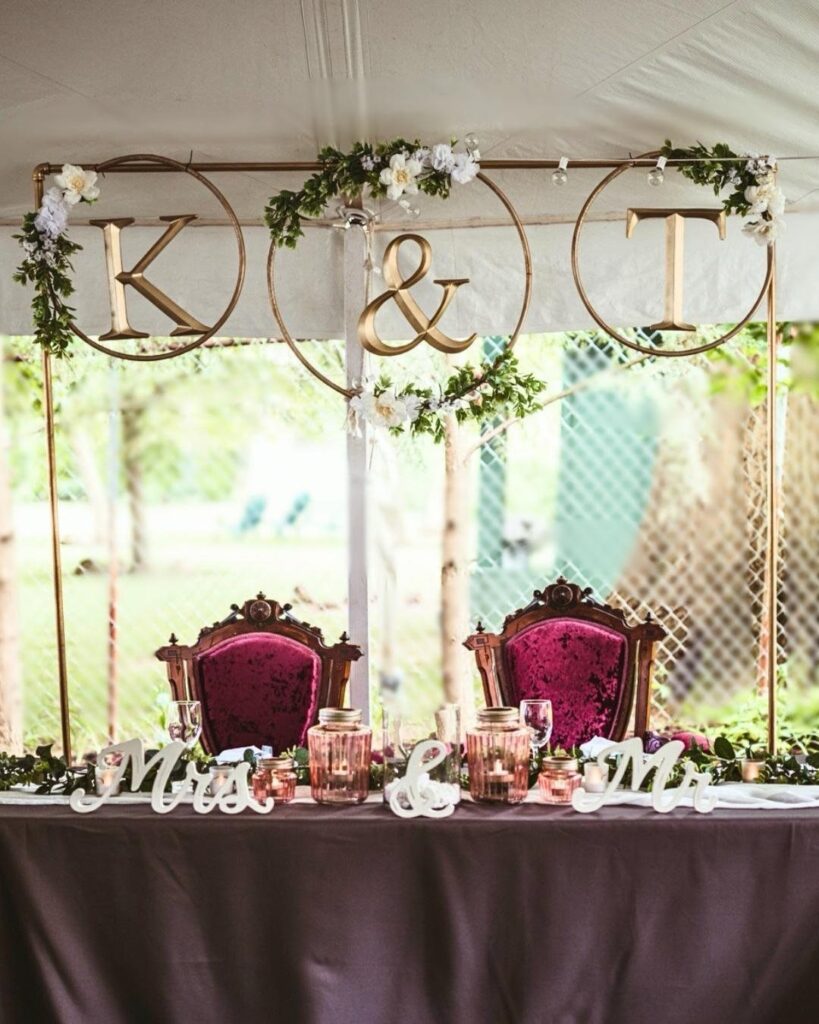
The personal mark matters most where guests spend time looking. A photo booth wall they pose against for an hour, a boutonniere caught in every formal portrait, a candle scent that returns them to the room months later.
Small efforts in high-attention spots outperform scattered effort across tables no one studies.
Crafting also paces the anxiety.
Having a physical task with a visible finish, separate from vendor emails and seating-chart logic, gives the planning a different rhythm. The process helps you relax, not because it is easy, but because it is concrete.
Planning DIY Projects
Start with what you will actually see in photos. The backdrop behind your vows, the table you both sit at, the invitation opening in your parents’ hands.
These justify the hours. Everything else can stay simple or bought.
Balance means repeating materials across projects so the room reads as one event, not a craft fair.
Natural cord from the macrame can bind boutonniere stems; the same ribbon ties bottle arrangements and covers floral tape. One palette, many projects.
Test the full setup once, in the actual space if possible.
A prototype invitation tells you assembly time; a trial candle burn checks wick behavior; a borrowed sideboard at the venue reveals whether the umbrella clears the door frame. The week before is for execution, not discovery.
Crafting with Friends
Group work turns the long projects into something social, but only if the host plans the session like a party.
One task per person, all materials pre-cut, a clear stopping point. Macrame knotting in particular suits this: one person can learn the pattern and teach it across the room, no expertise required.
Quality control slips when everyone is drinking wine and catching up. Boutonnieres need consistent pin angles; candle wicks must center; invitation glue lines should match.
Assign the finish work to one person with steady hands, or accept variation as part of the look. Do not pretend to perfection you will not achieve.
Food and music matter here more than they should. People stay longer and work better when the evening itself is the point and the craft is just the reason to gather.
Time Management
Finish early enough that a mistake is recoverable. Wax stored cool keeps for months; macrame backdrops fold and wait; wooden boards hang on a wall in your apartment as art until the day.
The week before is for the tasks that depend on fresh materials: farmers market stems, ice checks at the beverage station, final candle placement.
Time yourself on the first of anything.
Map out the real hours before you promise hand-calligraphy; one invitation takes longer than it looks, and fifty of them takes a weekend you might not have. A simple card with printed numbers exists because someone did this math.
The last-minute list should be short and physical: load, transport, set out, light.
Nothing that requires judgment or new skill. Your mood in the run-up sets the tone for the day, and sleep is part of that.
Frequently Asked Questions
What is a DIY wedding?
A DIY wedding is one where the couple makes some or all of their own decor and accessories instead of buying everything ready-made.
Handmade elements like photo booth backdrops, wooden signage, and paper invitations replace purchased versions, cutting costs while adding personal touches guests notice.
The math only works when you rent the drill or borrow the crimper instead of filling a closet with gear you’ll never touch again.
How do you plan a simple wedding?
Pick the 3 spots the camera lingers on: where you say your vows, where you eat, and the paper your family opens first. Pour your hours into those; let the rest stay store-bought.
Use the same linen or wood tone across projects so the space feels intentional, and run the full layout once in the real room so the final week is assembly, not surprises.
Why should I make my own DIY wedding decorations?
Handmade pieces cost less and show up in the background of every guest photo. A wall people line up against for an hour, or a candle they smell again at Thanksgiving, beats 10 table accents nobody notices.
What are some unique DIY wedding ideas?
A macrame backdrop built from repeated knots becomes a textured ceremony curtain that catches light and moves with any breeze.
Painted wood signs with your vows or menu can move to your hallway after, and chalkboard surfaces wipe clean for rehearsal dinner or morning-after brunch.
Dried thistle and poppy pods wired small for lapels keep their shape through heat and dancing, no bucket of water needed while groomsmen wander between portrait locations.